
If you are planning a new family desktop, home office computer, or first gaming machine, DDR5 RAM is probably on the parts list. The name sounds like something reserved for engineers, but the buying decision is fairly simple once you separate useful capacity from spec-sheet decoration. I have installed enough memory in Dell systems and custom builds to know that the best choice is rarely the flashiest kit. Build it once. Build it right.
What DDR5 RAM actually does
DDR5 RAM is the computer's short-term workspace. Your processor uses it to keep active programs, browser tabs, game data, and Windows services immediately available. It is not permanent storage like an SSD. Shut the computer down, and the information in memory disappears; your files remain on the drive.
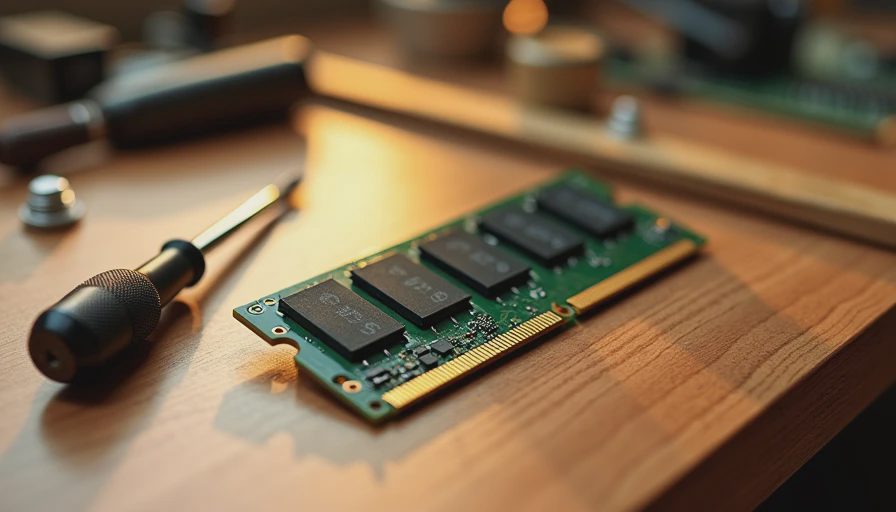
Compared with DDR4, DDR5 RAM supports higher transfer rates and can provide more bandwidth, meaning the processor can move more data during busy workloads. It also uses a different physical design, so a DDR5 motherboard cannot accept DDR4 modules. The notch is positioned differently, and forcing the wrong type is a good way to turn a simple upgrade into an expensive afternoon.
For everyday use, the difference is not that your email suddenly opens five times faster. The benefit shows up when several tasks happen together: a video call, twenty browser tabs, photo editing, a large spreadsheet, and a game downloading in the background. Newer processors and platforms are also designed around this memory standard, which makes it the sensible choice for most new builds.
How much memory does a family PC need?
For a basic home office computer, 16GB is still a practical starting point. It handles web browsing, Microsoft 365, video meetings, schoolwork, streaming, and ordinary photo management without making the budget uncomfortable. I would usually recommend two 8GB sticks rather than one 16GB stick because matched modules can run in dual-channel mode, allowing better memory bandwidth.
For a family computer expected to last five years, 32GB is the more comfortable choice. A 2x16GB kit gives Windows room for background applications and leaves less chance of slowdowns when several family members use demanding software. This is especially worthwhile if someone edits photos, works with large Excel files, runs virtual machines, or plays modern games while keeping a browser and voice chat open.
A 64GB kit makes sense for serious video editing, software development, large creative projects, or a workstation that will serve several demanding roles. It is usually unnecessary for homework and casual gaming. Spending $100 to $180 on extra capacity you never use is less sensible than putting that money toward a better SSD, quieter cooler, or stronger power supply.
Speed, timings, and compatibility without the headache
Retail listings often advertise speeds such as 5,600 MT/s, 6,000 MT/s, or 6,400 MT/s. Technically, MT/s means millions of transfers per second, not megahertz, although stores often use the terms loosely. Faster numbers can help certain processors and games, but the improvement is not proportional to the price. A reliable 6,000 MT/s kit is often a better buy than an expensive kit chasing a much higher number.
Timings describe how long the memory waits during certain operations. Lower timings are generally better at the same speed, but comparing a 5,600 kit with a 6,000 kit requires looking at both factors. For a normal build, do not spend an evening calculating latency differences unless you enjoy that work. Pick memory listed on your motherboard's compatibility page, use a reputable brand, and keep the settings reasonable.
Many kits advertise an overclocking profile such as AMD EXPO or Intel XMP. These profiles let the motherboard apply tested speed and timing settings instead of running the modules at a slower default. They are convenient, but they are still overclocked settings rather than an absolute guarantee. If a new system becomes unstable, returning the profile to default is one of the first troubleshooting steps I use.
Choosing a dependable kit
For a mainstream desktop, I look for a matched kit from Corsair, Kingston, G.Skill, Crucial, or TeamGroup with a clear warranty and ordinary heat spreaders. The metal cover mostly helps protect the circuit board and identify the module; it does not transform a budget stick into a performance part. RGB lighting can look nice through a glass side panel, but it does not improve reliability or frame rates.
Check the motherboard manual before ordering. Confirm that it uses DDR5 RAM, supports the capacity you want, and has enough slots for future expansion. Two empty slots can be useful, but filling four slots sometimes makes high-speed operation harder for the memory controller. If you already know you will need 32GB, buying a 2x16GB kit now is usually cleaner than starting with 2x8GB and mixing another pair later.

I also avoid mixing unmatched kits when possible. Even if the labels show the same speed, the memory chips and internal timings can differ. A computer may boot normally and then crash during a game or Windows update. A single matched kit removes one more variable, and fewer variables are exactly what you want in a computer that needs to work every morning.
What DDR5 RAM should cost
Prices move, but a decent 32GB kit commonly falls in the roughly $80 to $150 range during ordinary retail sales. A 16GB kit can cost about $45 to $90, while 64GB often lands around $160 to $280 depending on speed, timings, and lighting. You do not need an extreme enthusiast kit to get a responsive family computer.
When comparing deals, include the total system cost rather than chasing one cheap part. Saving $20 on memory is not useful if the kit forces a motherboard change or causes troubleshooting later. PCPartPicker can help flag obvious compatibility problems, while the motherboard manufacturer's support page provides the more authoritative memory list. Retailers such as Amazon, Newegg, Best Buy, and Micro Center frequently rotate prices, so a reputable kit at a normal sale price is worth waiting for.
Installing and testing the memory
Turn off the power supply, unplug the computer, and touch the metal chassis before handling the modules. Open the motherboard latches, align the notch, and press firmly until both sides click into place. Use the recommended slots from the manual, commonly the second and fourth positions when installing two modules. Do not judge installation by color alone; motherboard slot labels are more reliable.
After the first boot, enter the firmware setup and confirm the full capacity is recognized. Enable the correct EXPO or XMP profile only after the system starts normally at default settings. Then run Windows Memory Diagnostic or a longer test such as MemTest86 if the computer will handle important work. A failed test is not something to ignore. Reseat the modules, test one at a time, and return a defective kit rather than accepting random crashes.
For most households, my practical recommendation is 32GB of DDR5 RAM in a matched 2x16GB kit, bought from a known brand and listed as compatible with the motherboard. Choose moderate speed, skip unnecessary lighting, and spend the saved money on cooling and storage. That approach will not win a benchmark argument, but it gives your family a quieter, more dependable computer. Build it once. Build it right.